


Quick and Effective Facial Photo Retouching
Mar 5th in Photo Effects by ArikWhether it's for a friend, family member, or client, retouching images is very common these days. In this tutorial, I will lay down the basics of retouching and take you through the entire process, layer by layer.
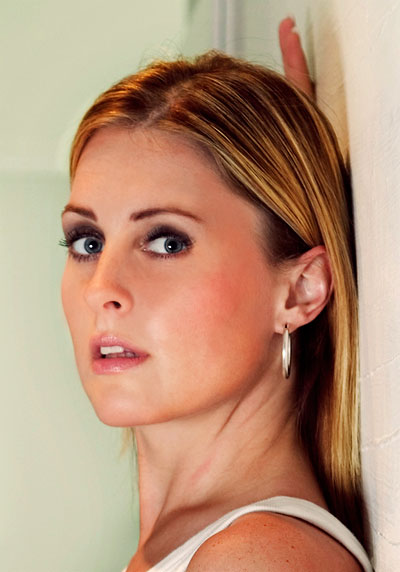
Sadly, I spent my money made from tutorials on 'Long Island Iced Tea cocktails' and therefore I am forced, yet again, to live in a box with a broadband connection and a computer. Therefore, I would like to thank Jean Scheijen for providing me with this beautiful free stock image. Free stock images, I love 'em!
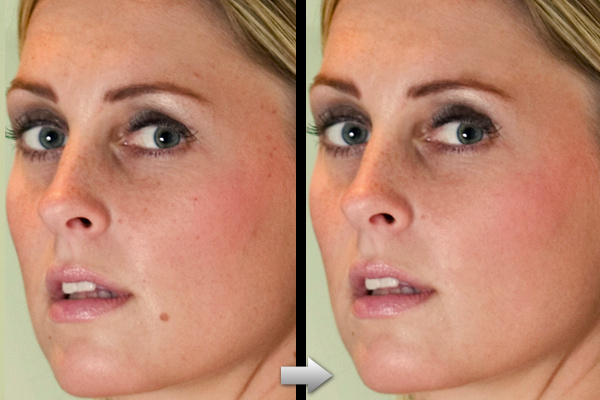
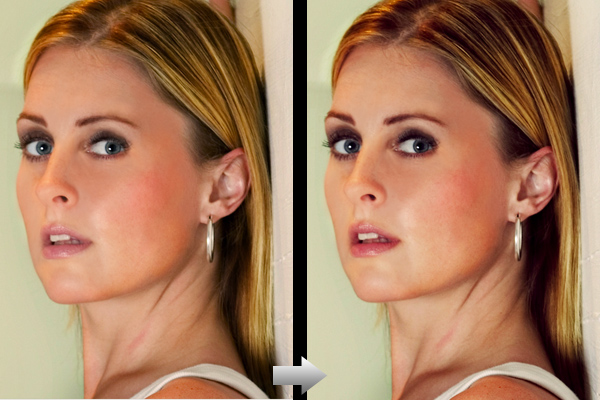
Here's a before and after (just roll over the image to see the before):
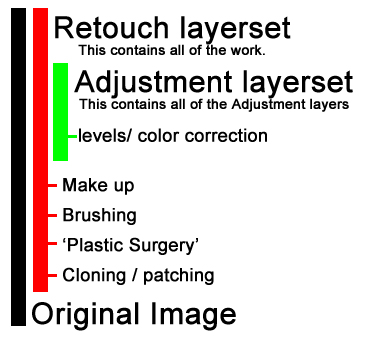
Lastly, before we begin with the actual tutorial, I would like to show you my layer structure. For me, this setup works great. With this setup, I can navigate quickly through my layers and cut down on my work time. All of the layers will be discussed in the tutorial, so don't worry if the scheme confuses you at the moment.
Step 1
We begin by duplicating the original layer, and with a combination of the Clone Stamp (S) Tool and the Healing Brush (J) Tool, try to remove all spots and blotches that we can find. In essence, we smooth out the skin this way and prepare it for the brushing. It is very important to use a soft brush when working like this, so that the end result blends better with the surrounding skin. If an area is hard to tackle, use the Clone Stamp Tool first and then blend the treated area with the healing brush.
Step 2
Symmetry is naturally attractive to human beings, and there are certain 'lines' that run across the face that when these are symmetrical, the subject seems to be more attractive to the eye. So let's give our subject a little plastic surgery. Duplicate the layer, and using the Forward Warp Tool found in the liquefy gallery (Filter > Liquefy... or Shift+Ctrl+X), raise the area around the eyebrow just a little.
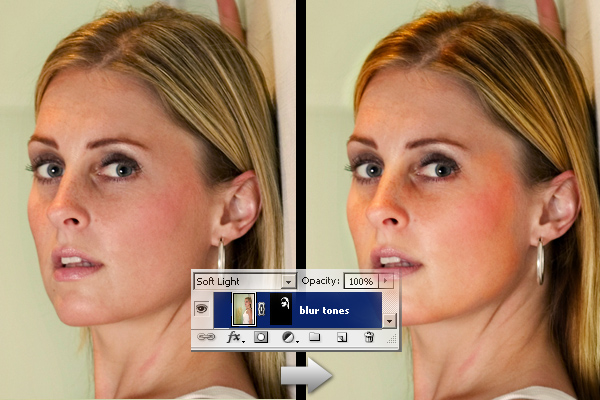
Step 3
Right now, we've come to the point where we can fiddle a bit with contrast, enhancing it further as we go. Let's use a modification of a well-known technique called the 'Angel face' technique...at least, that is what I always call it. Again, duplicate your layer and then go to Filter > Blur > Gaussian Blur and give this layer about a 8-10px blur. After this we set this layer to 'Soft Light'. Since we do not want this effect to be visible everywhere, I added a Layer Mask and filled that with black, concealing the effect. Then I took a big white, soft, round brush set to around 30-50% Opacity and started brushing around the nose, cheeks, eyes, and hair to enhance their color. This effect can do miracles for blond hair since it can transform it from a dull yellow-ish color to a vibrant gold color.
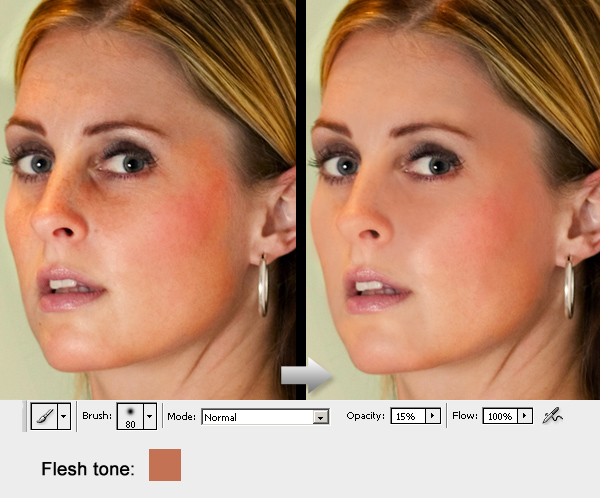
Step 4
Now we're going to focus on the actual airbrushing. This is a delicate process that requires a certain amount of patience and experience. Depending on your wishes or your client's wishes you will have to decide how much airbrushing you want to apply. For instance, models in magazines and especially adult magazines are usually heavily airbrushed since they have to look 'perfect'. On the other hand there are cases where you might just want to tweak the face by removing a few wrinkles or smoothing out the skin in a few places. For this reason, when I do the airbrushing, I generally do it over a few layers which gives me the option to switch layers on and off depending on how much texture I want to preserve in the end. On this image, I did the major airbrushing in two layers and merged them afterwards.
The trick is to use a low opacity (between 10 and 20 percent) soft brush. The color we pick comes from the image itself. When we pick the color, set the sample size of the Eyedropper Tool (I) to 51 by 51 pixels. If I remember correctly, this feature has only been available since CS2, so if you are using a version before that you will sample the color from a single pixel. Try to select an area where the skin is more or less smooth or set a flesh tone manually. Brush over an area multiple times and watch it become smoother.
The change is significant, especially around the nose area, and it is even more noticeable when the image is viewed on a much larger scale.
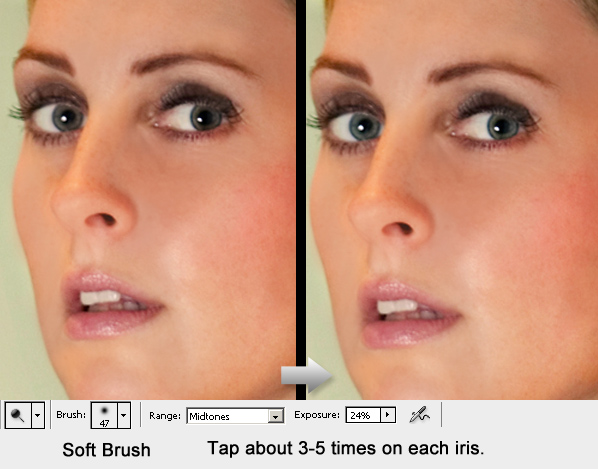
Step 5
After the airbrushing, let's tweak the lips and the eyes. The lips have been slightly saturated using the same technique as in step 4, just pick a color from the lips instead. Then make a selection around the eyes and use 'Layer via Copy' (Ctrl+J), which can be found under Layer > New > Layer via Copy, to copy the selected part onto a new layer. Make sure this layer is on top at the moment. On the new layer, use the Dodge Tool with the settings shown below to lighten the iris.
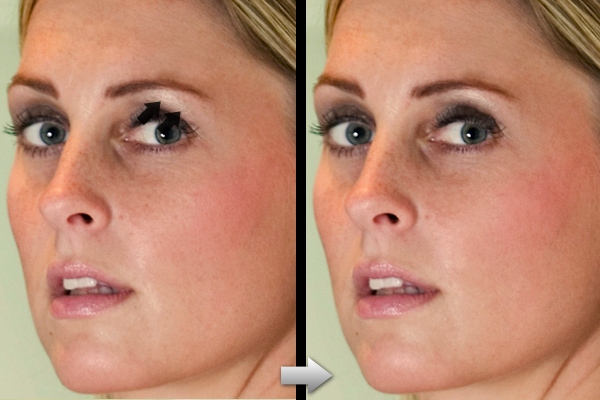
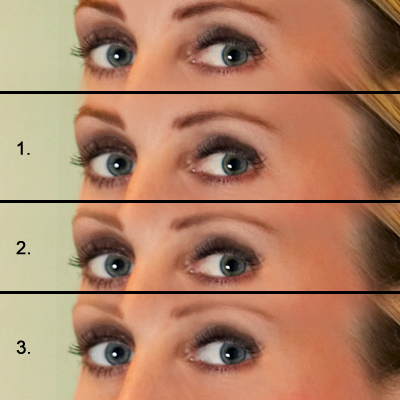
Step 6
This is the final step before we apply our adjustment layers and bring this piece to life. In this step, we're going to focus on the eyes a bit more, since these are very important in any portrait photograph.
1. Using a low opacity (15-20 percent) black brush, we enhance the make-up around the eyes. Don't worry if the change seems small, it will pop as soon as we add those adjustment layers.
2. With the same technique as used in step 4, get rid of those wrinkles around the eyes. Yes, we all have them or we are going to have them, and yes, we all seem to hate them.
3. Finally, let's desaturate the sclera (the white part of the eye). There are several ways to do this, but I believe that the easiest is simply to create a layer, select a white brush, and go around the white bit of the eye and set the mode of the layer to color. It's quick, easy and gets the job done nicely.
Step 7
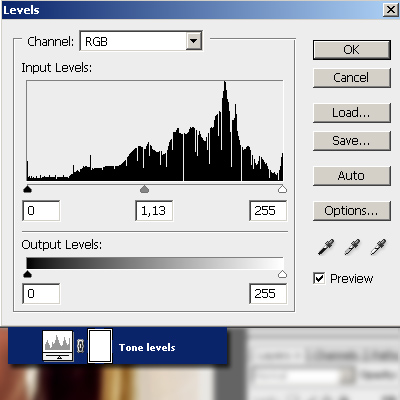
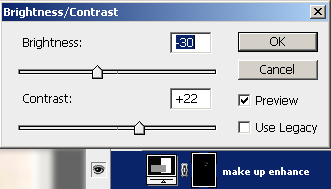
Time for the grand finale. This is the part where we make our picture stand out using the adjustment layers shown below. The adjustment might seem tiny but they make that crucial difference:
The levels and curves layers add contrast to the image as a whole and enrich the colors.

The brightness/contrast adjustment layer makes the make-up around the eyes and the lips pop out. As you can see, there's a mask applied to the layer. It is entirely black (therefore hiding the effect) except for the area around the eyes and the lips.
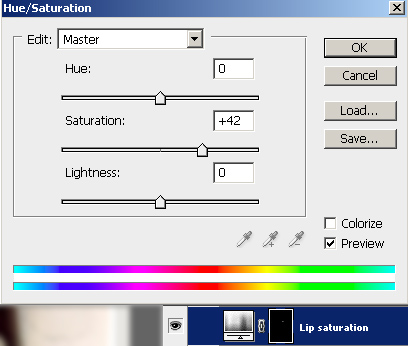
The lip hue/saturation adjustment layer adds a vibrant pink color to the lips. Again a mask is applied to limit the effect strictly to the inner area of the lips.
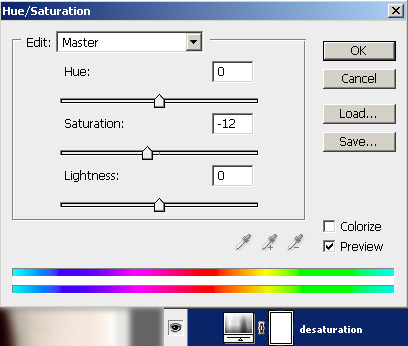
And finally, another hue/saturation adjustment layer to slightly remove the warm shade from the face.
And well, did all of this make a difference? You decide:
Conclusion
Well there you go, a complete overhaul. Oh, and just in case there's this voice in your head saying 'Well, she looks too fake,' send the image around to some friends and ask if they think that to. When you actually see the process take place, the person seems to look fake afterwards because you know what is wrong, but when you show the image to someone who doesn't know it's a Photoshopped image, you will get a completely different response. Download the PSD to see the larger image and you will appreciate the work even more (available via Plus Membership).
Have fun!
2 comments:
best and informative learning place. thanks for this god share
clippingplace
There is much idea this post. There are topics to be learned in this post. I will get a lot of work.Thanks for share.
Post a Comment