Have you ever felt that you have far too many "snapshots" of your family, and want a more professional-looking photograph to hang on your wall? Or perhaps you've been roped in to take a photograph for your company's magazine or website. Whatever the reason for wanting them, you don't need a photo studio and a ton of expensive lighting and camera gear to take portraits. With intelligent use of your equipment, thoughtful framing and due attention paid to lighting, anybody can take good portraits. Here's how.
1. Set up your camera. Where circumstances permit, use a slow ISO speed (lower number). In natural light, use "shade" or "cloudy" white balance if you have it; this leads to much warmer colours.[1] See How to Take Better Photographs for further elaboration and advice.
2. Get the lighting right. Those fortunate enough to have a photo studio can precisely control their lighting. They also aren't reading this; the rest of us will have to go out and find the right light. What you're looking for is consistent, and diffused lighting.
*Direct, harsh sunlight will cause ugly shadows to be cast on the subject's face.
Avoid direct, harsh sunlight from any direction. Apart from a few hours of soft light in the early morning and afternoon, direct sunlight is largely unfavourable for taking portrait photos. Looking into the sunlight will cause your subject to squint, and harsh light from behind will make it more difficult to get a consistent exposure.[2] From any other angle, it will cast harsh shadows on the face (including the horrid "raccoon eye" effect from direct overhead light). Overcast days are best, as clouds will diffuse the sunlight;[3] although since making your own cloud isn't typically an option, head for the shade.
* Fill the shadows. Sometimes you'll have no choice but to take photos in direct, harsh sunlight. If your camera has a flash sync speed fast enough, use your flash to fill the shadows. If not, get your subject or an assistant to hold a piece of white or colored card to bounce the sunlight into the shadows. You could use your self-timer and hold it yourself.[4]
* Don't rely on your flash. That is to say, if you don't have a ton of studio lighting (and you probably don't, since you're reading this), don't count on your flash to illuminate your scene or your subject. Using it to fill in shadows is fine; depending on it as your only source of lighting is usually a bad thing. Go outside if weather permits, or get more natural light into your scene by getting closer to windows if it does not.
3. Make your subject comfortable. A comfortable subject will feel happier, more relaxed and less "posed". This will make for much better shots.
* Get to like your subject, and have them like you. If you have time, talk to your subject. Learn to be genuinely interested in other people (or if you're terminally sociopathic, fake it). As one photographer writes about the famous photographer Elsa Dorfman,
Elsa has the same kind of studio, background, lights, and equipment as a lot of folks with more technical skill. Yet those folks aren't portrait photographers and Elsa is. What's the difference? Elsa cares about people. She is genuinely curious about people she has never met and can connect with them in just a few minutes. After a one-hour session, she knows more about her average subject's life than I do about my sister's.[5]
* Get them comfortable with you having a camera around, time permitting. Many, probably most, people freeze up and feel awkward the moment you pull the camera out.
*Would you want to be on the other end of one of these?
Factor your subject's feelings in with your lens choices. This is not as strange as it might sound. A super-wide angle lens will require you to travel halfway up the nose of your subject in order to frame the photo properly. On the other hand, a subject might feel distinctly awkward at a monster Howitzer-sized telephoto pointing at them from 50 feet away.
* Give your subject something to play with. People with something in their hands will relax their shoulders more and feel less awkward than they would if they were standing around doing nothing.[6] If you're taking body shots, have them hold something relevant to them as a person (for example, an executive might hold a book,[6] a child might hold a teddy bear, a photographer might hold a camera, and so on). If you're not taking body shots, even better; find something to keep their hands occupied. Try a stress ball or something else that gives your subject something to do.
4. Choose your lens and frame your shot. There are three primary ways to frame a portrait; which you will choose is a matter of artistic judgment.
* The head-and-shoulders shot. If you're starting out taking portraits, this is probably the best place to start. For this, use a telephoto lens. Ignore the myth of a "portrait lens". There is no optimal lens focal length for portraits.[7] Longer lenses are good, because they force you to stand further back, and consequently, due to perspective, facial features like noses are de-emphasised (but see "factor in your subject's feelings with your lens choices" above). They also give the illusion of a shallower depth of field (i.e. blurring the background more).[8]
In accordance with the rule of thirds, have the subject's eyes one third of the way from the top of the frame. Set your camera to aperture-priority (Av) mode and use a large aperture to blur the background to make it less distracting (or if you have a "Portrait" mode on your camera, use that instead).
* The body shot. All of the above applies. Have your subject stand at a slight angle to the camera; they will look slimmer and more relaxed.[6]
* The "environmental" portrait, of people in action and in context. Compared to the above, this is difficult to get right and very easy to make into a mere snapshot, so tread carefully. Use a wider-angle lens for this sort of thing.
*Zooming in "too close" is one of many things which you can experiment with.
Everything else. The cost of experimentation with digital cameras is almost exactly zero. If you have time, try different and drastic angles, strange framing, zooming in "too close", and so on (see also "ignore this article", below).
5. Focus and take your pictures. If your camera has an auto-exposure and auto-focus lock, then meter and focus on the subject's face, lock, reframe, and then take your photo.
6.Sharpening hair and clothing and brightening eyes makes a subtle, but noticeable, difference.
Post-process your photo. Use advanced photo editing software like GIMP or Photoshop. Correct the colour balance and remove any haziness. You might want to sharpen features like hair and clothing; smooth out lines and imperfections in faces (this latter part might not be necessary; the sharpening of other features in the photo will make skin look smoother, because our eyes perceive sharpness and softness relative to other things in the photo). Brighten the eyes using the "Levels" tool.
7. Ignore this article. Photography is an art, not a set of methods. You can follow all these steps and still take an uninteresting photograph that you dislike. Technically "incorrect" photos can be the most stunning, such as those which are hugely over-exposed, harshly lit, packed with "distracting" background detail, strangely composed, and so on.[9] Know the rules, but know that you can, and should, break them whenever you see fit.
-

Welcome to Allpixels' s blog
Welcome to my blog. This is my family portrait from left to right : Minh Le, Nguyen Le, Chinh Le, Lucy Le , ...
-

Greeting Seasons
Greeting Seasons from our family to yours. Merry Christmas and Happy new Year. ...
-

Greeting Seasons
These are photos that was taken and uploaded by: Chinh Le " Allpixels". And they had been process using Photoshop CS5, ...
-

San Francisco
The Family trip to San Francisco. This is the first trip for my wife and my two sons since Lucy came to US we all very excited The family portrait was taken by our cousin with my Canon XSi and taking in the rain too, ...
-
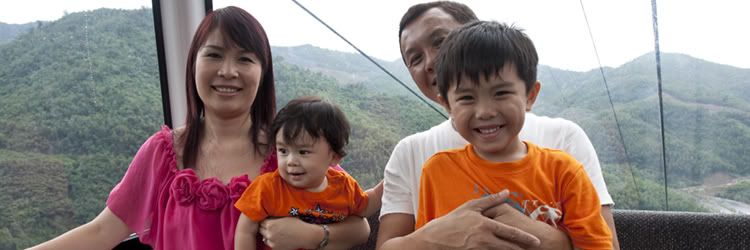
Ba Na, Viet nam
A memorable trip to Viet Nam summer 2010 ...
0 comments:
Post a Comment