


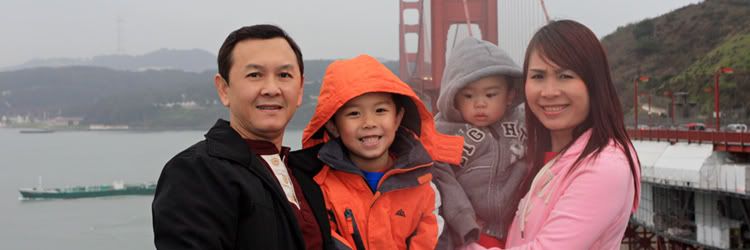

Final Preview

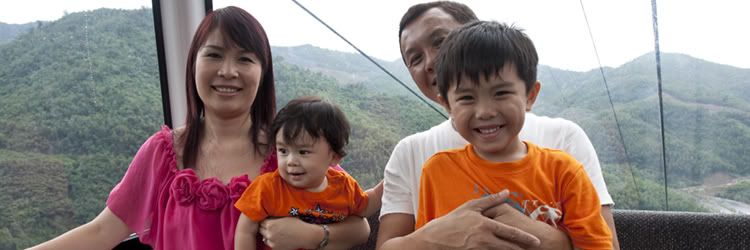
Original Stock

Step 1
Open up your selected photo and immediately create a new gradient map (image/adjustments/Gradient Map). Make sure the gradient map is set from black to white, then click OK.

Step 2
Duplicate the layer and then add some gaussian blur (filter/blur/gaussian blur). In the dialog box set the blur radius to 7px and press Ok. In the layers panel set the opacity of the new layer to 50% and then merge it with the background layer.

Step 3
Open up the curves dialog box (image/adjustments/curves) and set the RGB channel output and input levels to 87 and 139 respectively. Then Duplicate the layer, set the layer mode to Overlay and set the opacity to 75%. Finally merge the layers.

Step 4
Duplicate the background layer and again create another gradient map just like we did in Step 1. Set the opacity of the new layer to 75% then set the contrast of the layer to 15 (image/adjustments/brightness/contrast), and merge the 2 layers.

Step 5
Duplicate the layer and press Ctrl L to open up the levels dialog box. Inside the levels dialog box select the green channel and set the input levels to 7, 1.0 and 250. Then set the blue channels input levels to 5, 1.00 and 250 respectively and you’re done.

0 comments:
Post a Comment